
 Sign In













You’re on social media because you want to stand out.
But standing out can be pretty tough these days. Especially when everyone has access to the same tools as you do.
It’s the double-edged sword of accessibility. It may be easier to reach your demographic than ever before, but now your demographic is being constantly targeted by your competitors.
If you want to gain people’s attention and earn their respect, you’ll need to create plenty of amazing content.
While blog posts and articles are important, visual content is slowly becoming one of the pillars of most successful social media marketing strategies.
And it’s no surprise, especially when you look at all the science and data supporting its use.
Just look at how Designmantic breaks down the biological reasons why visual media is such a powerful tool on social media.

Success on social media is defined by how well you’re able to balance efficiency with value.
Since your marketing efforts are directly influenced by the needs of your audience, every business will need to adopt a different approach.
But no matter what kind of business you’re running, there’s no getting around the fact that things like fluff pieces and valueless self-promotion aren’t going to help your brand.
When it comes to social media, your marketing efforts must provide value if you want them to be taken seriously.
Speaking of value, few marketing tactics are able to deliver value as quickly or easily as a piece of visual content.
HubSpot found that Facebook posts with images saw more than twice the engagement than those without images!
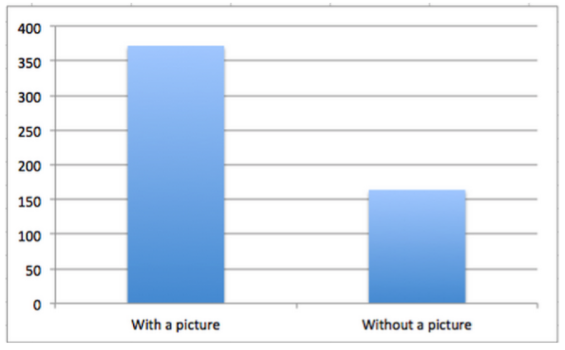
It’s easily one of the most effective ways to add another layer of depth to your branding efforts. Compelling visual content is the solution to standing out in a saturated marketing landscape.
Why creating visual content matters
Before anyone runs off and starts looking for images online, let me clarify something.
Your social media marketing campaign should have both curated content and unique content that you’ve produced.
Incorporating images into your content is a step in the right direction, but it’s not going to be enough to propel you into the role of online authority.
This is especially important in an age when lots of people are already stealing other people’s content for their own campaigns.
Create content yourself. The photo should be one that you took yourself. The video should be something you and your team put together.
Authenticity is in short supply when it comes to social media marketing, so the more you’re able to provide, the better.
There’s nothing more authentic than a photo or video you took with your own phone!
Take a page out of Gary Vaynerchuk’s book and document your brand.
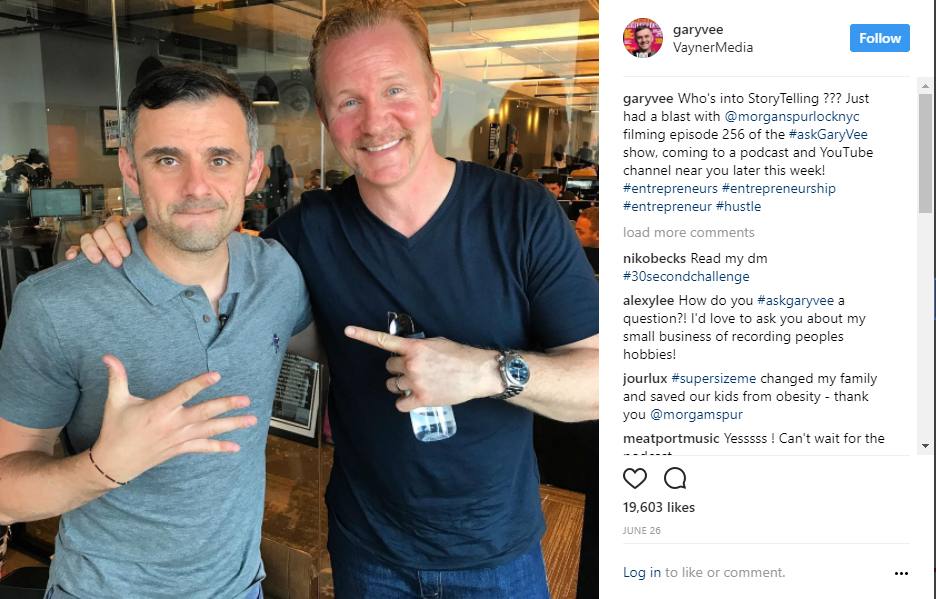
Having completely unique content is also an easy way to be seen as a legitimate online authority.
Creating your own visual content allows you to take advantage of all the unique aspects of your business and put them on display for the world to see.
All of this leaves just one question. How the heck do you create compelling visual content?
Photos
There’s a three-step process to taking amazing photos for your content.
1. Prepping your phone
Since you’ll be doing all of this with your typical smartphone, it’s important that we start by looking at how to prepare your phone to capture the best photos it can.
That’s right, you might have the latest iPhone, but if you don’t tweak the settings accordingly, you might not end up with stellar photos.
So, how should you go about setting up your phone?
Right off the bat, you’re going to want to turn HDR (High Dynamic Range) off.
It’s complex and difficult to get right. Trust me — you’ll thank me later.
This article is going to get technical enough, so I’m not going to spend time teaching you exactly how HDR works.
What I will teach you is how you can turn the darn thing off.
First, open your Camera app. You should see the HDR icon in the top toolbar, second from the left.
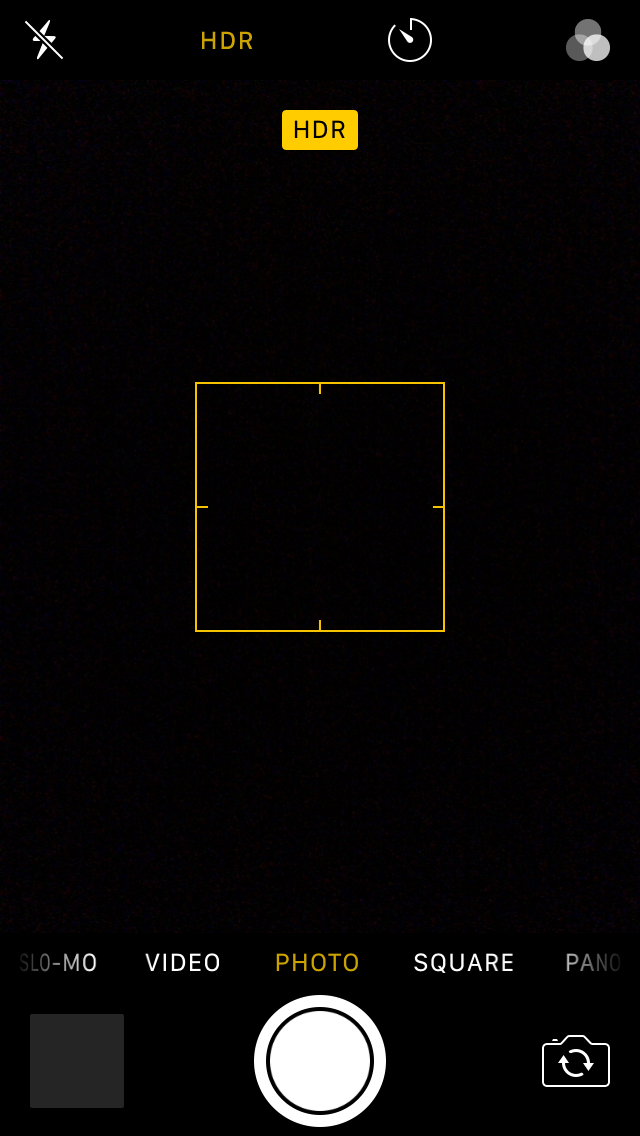
If it’s on, tap on it and you’ll see a list of options.
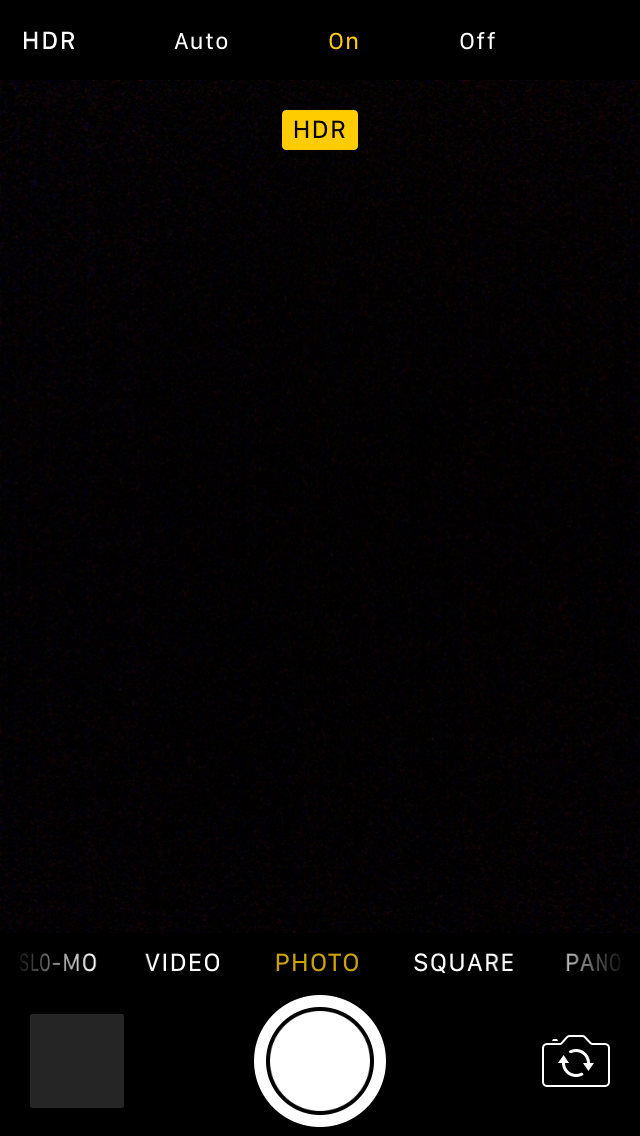
Tap on the off button and now you’re ready to move onto the next step!

The second step to setting up your phone is to change the exposure of your photos.
If you’re wondering why this is important, think back to a time that you took a picture of a bright sky.
Did you notice anything strange about it? Maybe the fact that most of it looked overexposed?
That’s because smartphones tend to blow out certain sections of your photograph naturally, which is why you’re getting those over-exposed areas.
Fortunately, there’s a quick fix for this.
If you’re able to underexpose the shot, you’ll be able to capture everything properly without blowing anything out.
If you’re scared that you might end up with a picture that’s underexposed, no need to worry.
Underexposed photos can be tweaked and brightened up with editing, which means that you can be sure the photo comes out the way you want it to.
Here’s an example off of the Airbnb Instagram page.
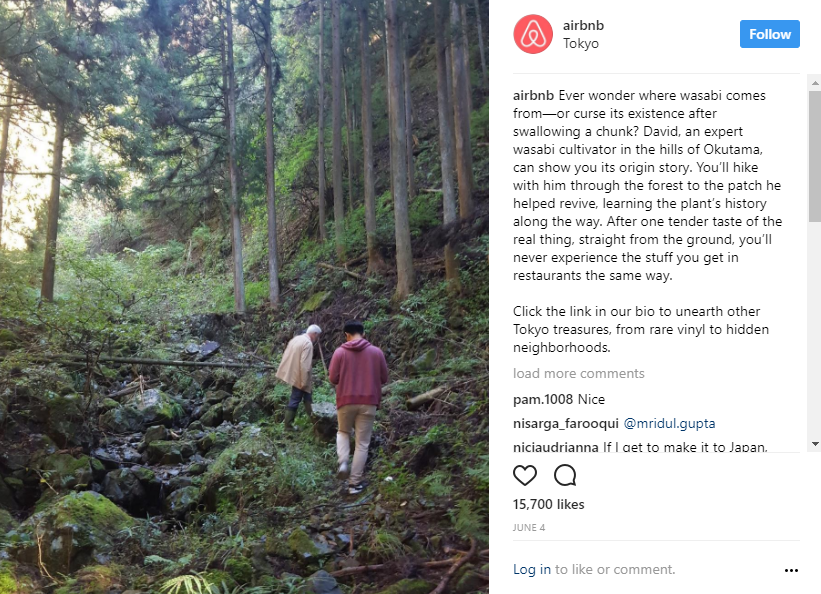
Believe me, it’s better to have an under-exposed shot that you can fix with editing than a photo that’s completely ruined due to over-exposure.
To ensure that your photo is under-exposed, all you have to do is tap on the brightest part of the camera and hold it.
This will lock the exposure and the focus, which means you can move your camera around and take the picture you want.
Believe me, this is going to make taking pictures in the sunlight much easier.
And with that taken care of, it’s time to address the elephant in the room.
2. Capturing the photo
If you’re feeling a bit intimidated by this section, don’t worry. I won’t be teaching a college course on photography here.
I’m all about the essentials. Which is why today, we’re going to focus on the two most important aspects of taking an amazing photo.
To put it simply, lighting and composition are going to dictate the quality of your photos.
There’s more to lighting than just making sure your daytime pictures aren’t over-exposed.
It’s worth starting with this topic because, without good lighting, your photos are destined to be useless.
When you’re in a dark room, you might think that there’s enough light, only to find out later that the picture is completely unusable.
If you’re outdoors during the daytime, you might be able to see fine, but your phone just over-exposed half the shot.
The most important rule with lighting is that you need to be aware of it before you start shooting.
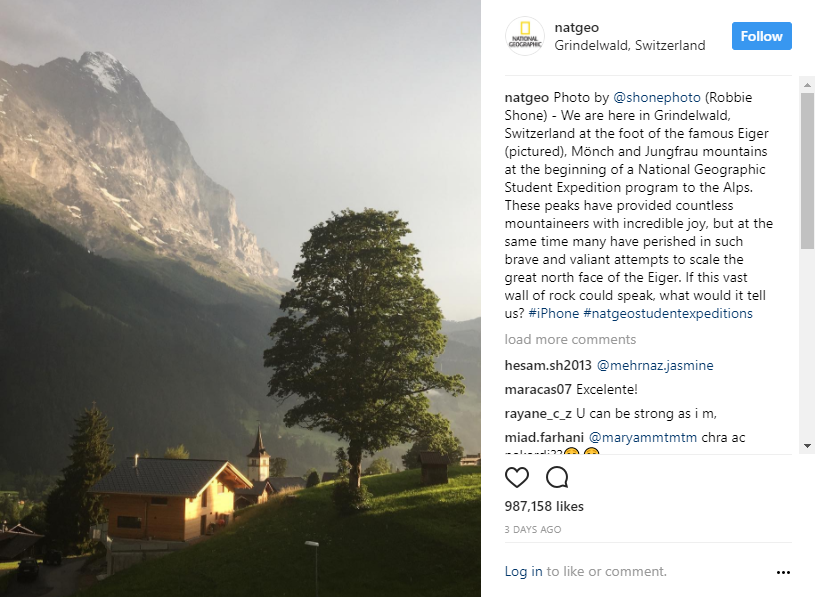
From there, you’ll want to make sure you’re using natural light as often as possible.
Take a look at this image from National Geographic to get an idea of what you can do with natural light.
If you like, you can definitely go out and buy some lights for things like product picture photo shoots.
But honestly, natural light should be enough for most of your photo needs.
If you’re shooting indoors, do your best to be near a window and away from artificial light.
The problem with artificial light is that it tints your photos yellow, which can ruin your perfect shot.
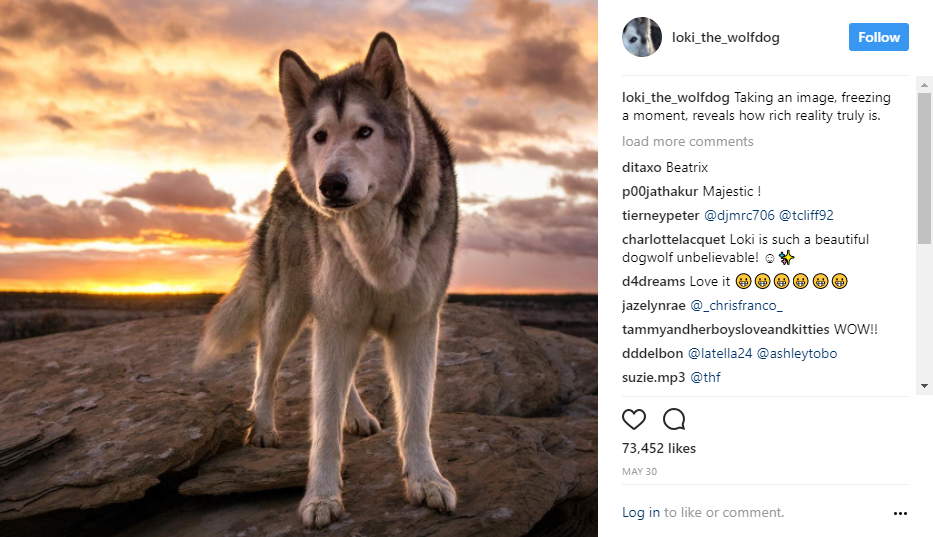
Pro tip! There’s nothing quite like a photo at dawn or dusk to take advantage of the unique light contrasts.
Here’s a great example by Loki the Wolfdog.
On the opposite end of the spectrum, don’t be afraid of taking photos on cloudy days.
It might seem like this would be a lighting nightmare, but in reality, the gray weather means that the light spreads out everywhere.
This weather will present you with plenty of interesting options while editing your photos.
Now that you’ve found the perfect environment, it’s time you decide how you’re actually going to take this photo.
There are so many components to composition that talking about all of them would take us all day.
But we’re here to discuss the essentials, right? So once again, let’s look at the fundamentals of composition and make sure you’re ready to take amazing photos by the end of this article.
If you remember nothing else from this section, remember this: the Rule of Thirds will work wonders for your photos.
This rule is considered a staple of the photography community and with good reason. When applied correctly, it can turn an average picture into a compelling one.
Here’s what you need to know.
At its core, it’s essentially a way to align your photo so that you’re creating as appealing an image as possible.
If that sounds confusing, pay attention to this next part because I’m about to give you the quick fix to this.
If you’re looking for a way to create the best image, but you’re not sure about this whole ‘Rule of Thirds’ business, you’re in luck!
There’s a ‘grid’ setting on your phone’s camera that you can turn. It handles all the heavy lifting for you.
To turn this on, hop into your settings on your iPhone, scroll down to the ‘Photos & Camera’ tab, and tap it.

Once you’ve done that, you can scroll down to the ‘Camera’ section and you’ll see a tab labeled ‘Grid’.

From there, you can turn the ‘Grid’ mode on.

Once you’ve done this, you should be able to head back to the Camera app and see this from now on.
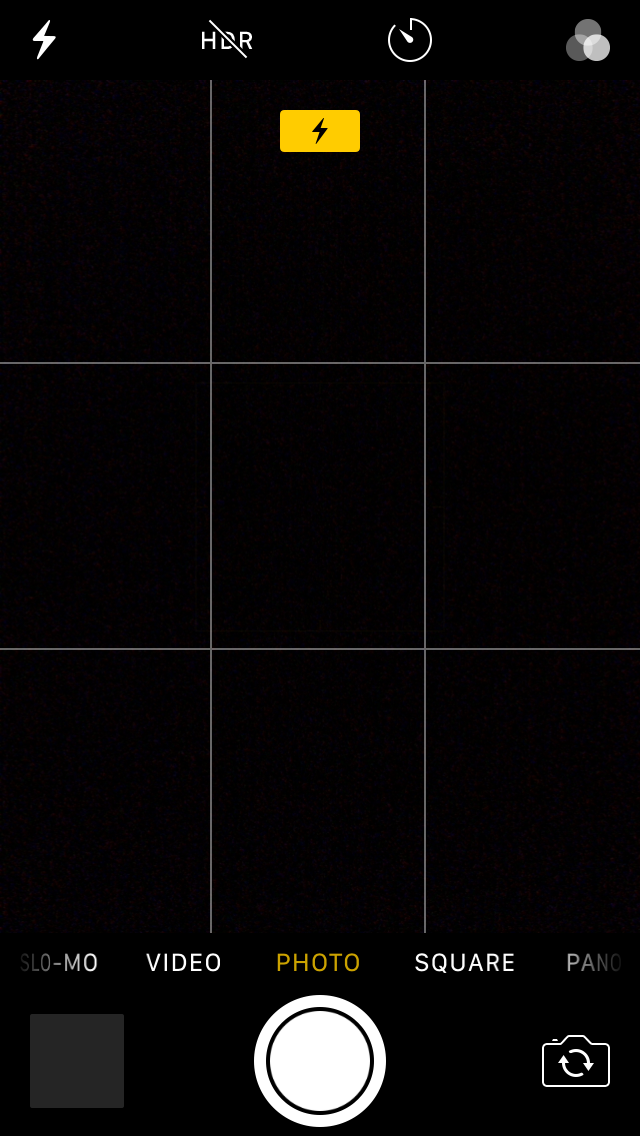
As far as how you should be applying the grid, here are a few examples.
Let’s say you’re in front of a painting, getting ready to take a picture. Start by positioning your camera in the center of it.
From there, you’ll be able to use the grid to determine how to take the picture. Pay attention to where the lines are, and play with them a bit to see which variations draw you in the most.
That actually leads me into my next point about capturing amazing photos: Don’t be afraid to play with the photos themselves.
Your first few photos will probably feel a bit underwhelming. What’s important is that you keep experimenting with styles and different variations.
Not only does this keep your content from getting stale, but it also increases the chances that you’ll stumble onto something that resonates with your audience.
Taking photos will help you stand out. Developing your own unique style when it comes to capturing photos will ensure that your brand becomes instantly recognizable.
Experimenting with the kinds of photos you take is one of the easiest ways to start developing that unique style.
But having a unique style goes beyond that. You can take banner-style pictures that come together to form a single image when people look at your profile.
Here’s musician A$AP Rocky’s Instagram with an example.

Make sure to combine this experimentation with analytics to make sure you’re actually creating content that your audience enjoys.
No matter what kind of content you’re creating, your marketing efforts should always be data-driven.
And finally, there’s the issue of the color palette.
This is actually a topic that some of the more seasoned marketers might already be familiar with. Even if you’re not aware of how this works, you’re probably at least aware of its importance.
Color palettes (or style palettes, depending on what you’re doing with your social media profiles) are all about making the most out of your photos.
Here’s a complete color emotion guide that The Logo Company put together.
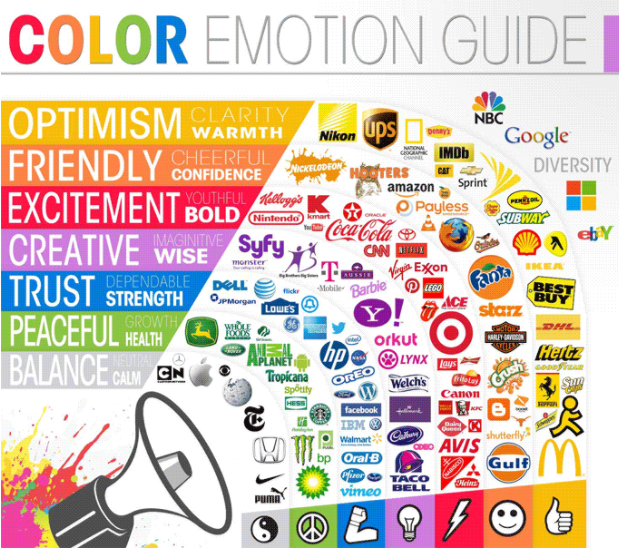
If you’re completely at a loss, here are a few tips.
- A neutral color palette is typically minimalist in nature. These are great for fashion or lifestyle brands.
- A warm color palette is more inviting and pairs well with things like food brands.
- A cold color palette creates a sense of distance and works well with landscape or nature brands.
Learning color theory can help you maximize your photos for marketing purposes.
3. Editing the photo
Just because you’ve taken the picture doesn’t mean you’re done.
To truly make it ‘amazing’, you’ll need to put it through the editing process to make sure it’s ready for your audience.
There are two schools of thought here.
First, we have the people who only edit on desktop computers because they like having the freedom to play with some very complex tools. More specifically, Photoshop.
If you’re hoping to get precise, intense edits, then Photoshop is going to be your best bet.
This is what the pros use, as shown on the official Photoshop website.
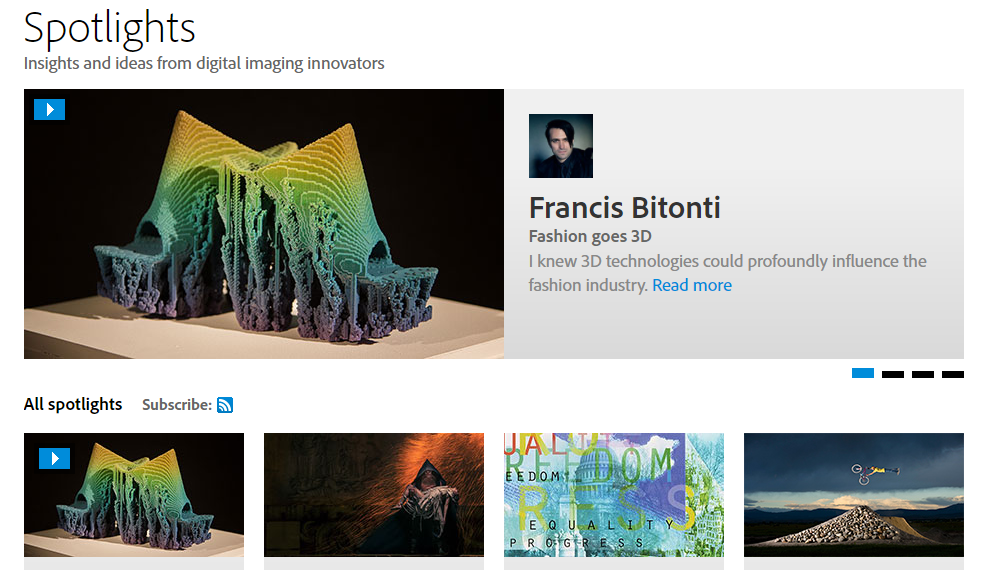
There are plenty of other tools on the market for photo editing, but few are as easy to use or as expansive as Photoshop.
Pro Tip! If you’re on a budget, Gimp is a free alternative to Photoshop with a nearly identical toolbox.
The second school of thought believes in getting it all done in one place.
Mobile photo editing apps might not be as powerful or in-depth as Photoshop, but they certainly get the job done.
My personal favorite? These days, I’m using Canva constantly.
It’s straightforward, intuitive, and best of all, it’s free.
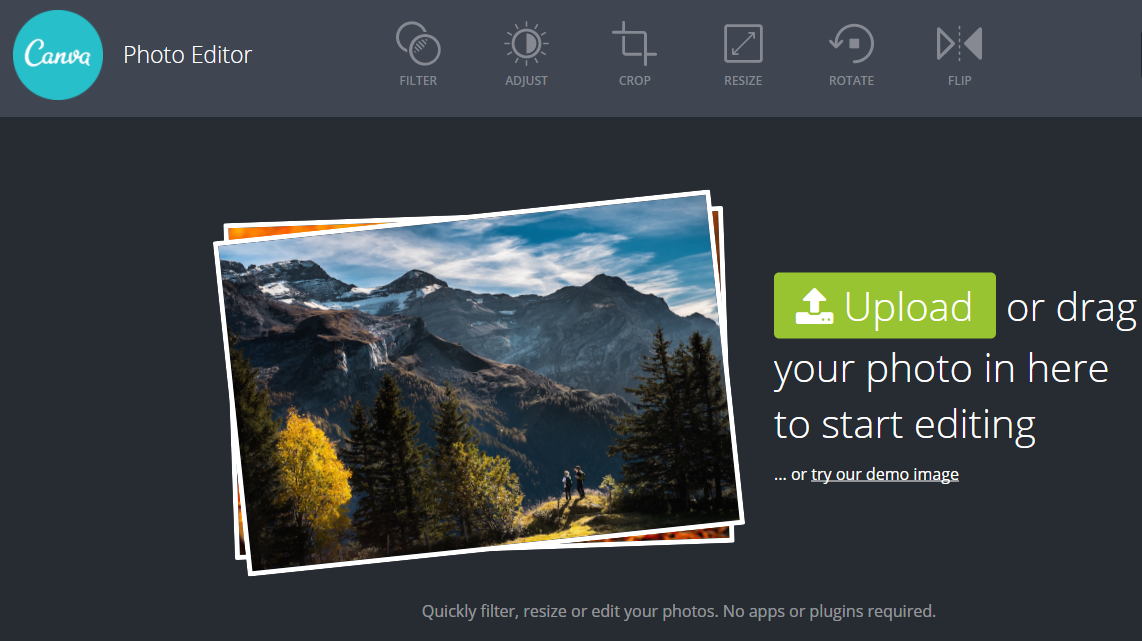
If you’re wondering what kinds of editing you should be doing to your images, here are a few things to keep in mind.
First, don’t go crazy with the filters. If you use any filter at all, make sure that it doesn’t change the original composition of the photo.
The easiest way to think about editing if you’re a total beginner is to focus on the big three.
Brightness, contrast, and saturation. Move between these and experiment until you find the perfect blend of all three.
Videos
There are three building blocks for creating amazing videos for your marketing campaign.
Honestly, most of what we talked about for capturing amazing photos is going to directly translate into capturing compelling videos.
Composition and lighting are just as important here. The same rules for the editing process apply, as well.
That being said, there are still a few differences worth paying attention when it comes to creating videos.
1. ‘Authentic’ doesn’t have to mean ‘amateur’
Let’s look at Instagram Stories for a second.

When marketers discuss why Instagram Stories is such a powerful marketing tool, they often mention that it gives brands and businesses an ‘authentic’ way to connect with users.
And they’re absolutely right! There’s just one problem.
‘Authentic’ doesn’t mean ‘amateur’.
Instagram Stories and Instagram Live don’t demand insanely high production values. Like everything else in this article, we’re still focused on using phones.
But there’s no reason that you can’t take a few minutes to prepare yourself to greet thousands of followers.
There’s nothing more annoying for your audience than tuning into your live broadcast, only for you to realize you weren’t ready and cancel the stream.
Have a reason for streaming, even if it’s something as simple as a Q&A. Make sure you’re ready to stream before you start.
Tools like Instagram Live should be used to dissolve the barriers between you and your followers, not to make your followers question whether they should bother tuning in next time.
2. Slow and steady wins the race
If you’re not a trained photographer, no one is expecting you to revolutionize the photography game for visual marketing.
But you should make sure you’re not breaking any of the cardinal sins of video creation.
What am I talking about? I’m talking about shaky cam.
The easiest way to end up with distorted, blurry, unusable footage is to move your hands too much while recording.
Here are some quick tips for capturing the best quality video.
- Hold the phone with both hands.
- Rest the phone on a surface to minimize any shaking.
- Invest in a stabilizer, tripod, or camera cage to keep your phone stable.
People online seem to favor the LanParte HHG-01, which you can see below.

3. The importance of audio
Audio is an aspect of video that people tend to ignore, simply because they’re so focused on creating engaging visuals.
While the visual component is absolutely vital to a video’s effectiveness, it’s also worth noting that a distinct advantage of video content is that it is paired with an audio component.
Especially on social media, it’s important that the visual component is compelling enough to draw people in.
But once those people are drawn in, the audio quality should match the video quality to assure your audience that you take content creation seriously.
Unfortunately, there’s one issue with all this. The microphones on smartphones have a tendency to pick up the wind and other unnecessary environmental noise.
Even worse, this noise is almost impossible to edit out later.
So, how do we solve this?
Make sure the location where you’re shooting is as quiet as possible. If you can shoot indoors, even better.
The key is to reduce ambient noise and ensure that the audio quality meets your audience’s expectations.
Video editing
Can you edit videos on your phone? Sure, and some of the tools you’d be using aren’t half bad.
If you have your heart set on editing on your phone, Pinnacle Studio, as you can see below, is a great tool that offers quite a few features, like speed control, picture-in-picture, and edits.
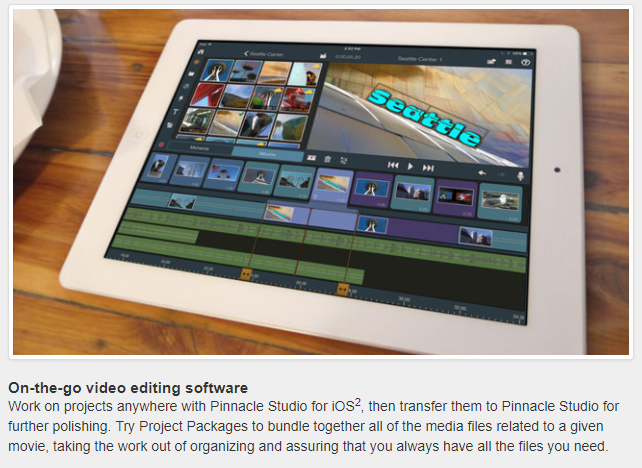
That being said, if you’re looking to get the most out of the video editing experience, you’re going to have the best luck on a desktop.
Windows and Mac both have their own unique tools, Movie Maker and iMovie respectively. These are free, user-friendly tools that you can use to add captions, music, and much more.
Conclusion
Diving into the deep end of visual content creation can get very confusing very fast.
Instead of trying to do it all at once, start with one type of visual content. If you’re drawn more to the photo content, get comfortable with that first.
If the video content seems like it’ll be a better fit for you and your brand, focus on that.
The key is to avoid biting off more than you can chew and to make sure that you’re creating the kind of content that your followers enjoy.
It’s really that simple.
Armed with this knowledge, you’re ready to start creating your own unique content and soon, you’ll be on the path to turning your brand into a true online authority.
What’s your experience been with creating visual content? What kind of content do your followers resonate with the most, photo or video?